Announcement

Collapse
No announcement yet.

My Asymmetric Electrodynamic Machines

Collapse
X
 
  • Filter
  • Time
  • Show
Clear All
new posts

  • Originally posted by JohnStone View Post
    Please check if its dimensions fit into stators. It might be necessary to cut a bit from outer diameter an lathe.
    JS
    G'day John
    Yep on My 3 P56 motors I had to file the end plates so they would fit in to the Stator housing it took about 30 min each

    Kindest Regards

    Comment


    • Originally posted by iankoglin View Post
      G'day John
      Yep on My 3 P56 motors I had to file the end plates so they would fit in to the Stator housing it took about 30 min each

      Kindest Regards
      Hey Kogs

      How your bike coming along? I've been waiting for a new vid from you. Let's make it happen.

      As far as the end plates go, I didn't see any problems with mine. I will address those issues later, if they arise. Do you have any pics of what you had to do to your end plates?

      Midaz

      Comment


      • Originally posted by Midaztouch View Post
        Hey Kogs

        How your bike coming along? I've been waiting for a new vid from you. Let's make it happen.

        As far as the end plates go, I didn't see any problems with mine. I will address those issues later, if they arise. Do you have any pics of what you had to do to your end plates?

        Midaz
        G'day Midaz and the rest of the team
        As far as the end plates both the cast Iron front and the aluminium brushes end they just would not fit into the Stator housing or they would fit with a Little persuasion like with a hammer when in I could not rotate the end plate so I had to file the rebated end plate so it would fit snug but still able to move it by hand

        With my bike I have been trying to assemble a monster 5.1 as per JS's instructions and as I did not have a signal generator I had an Oscillator that I was able to adjust to 1 hertz and I was able to see on my Oscilloscope how the Opto worked it went from 0v to 5v and when I connected the LED to it the LED fried and the Oscillator became defunct.
        I do not know why but I have had the same trouble with these Oscillators from Ebay here
        Square Wave Signal Generator Duty Ratio Frequency Adjustable Signal Source | eBay

        I know that it worked so I continued on with the assembling with the rest of the components except the Gate resistors and Mosfets. I now am going
        to finish it and get a Oscilloscope shot then try and fit 4 Mosfets 2 x 2 t in parallel and see how the Scope shot compares.
        I have an engineering friend who modifies the motors mechanically so as to wind them Asymmetrically he already has modded my 3 P56 motors and the MY1000w motors and now that I have some My1060's 2-250w and 2- 350w prepared for him he will do the mod's next week so that I have them 2 motors ready to wind them and then we will see how they Go

        My Driver can't wait for me to get them finished so she can do some more testing
        Kindest regards to you all

        Comment


        • Front bearings

          Imperial builders,

          The motorcycle engineer said it is best to use an Angled Bearing for the front of the Imperial. Angled bearings have a stronger static and dynamic load capability. They are best suited for High RPMs with a varying load; road usage or a machine that has to change angles. Also the front bearing could be wider. The front bearing housing could be increased depth wise by lathe.

          Just a small tip

          Midaz

          Comment


          • Originally posted by iankoglin View Post
            ......I was able to see on my Oscilloscope how the Opto worked it went from 0v to 5v and when I connected the LED to it the LED fried and the Oscillator became defunct.
            I do not know why...
            Hi,
            sorry for your loss of electronics. I am confused too about your problem. It would be a great help for helping you if you would be able to post a circuit diagram of your setup with generator and driver. Obviously there was something wrong but I can not detect it by words only.
            JS
            Experts spend hours a day in order to question their doing while others stopped thinking feeling they were professionals.

            Comment


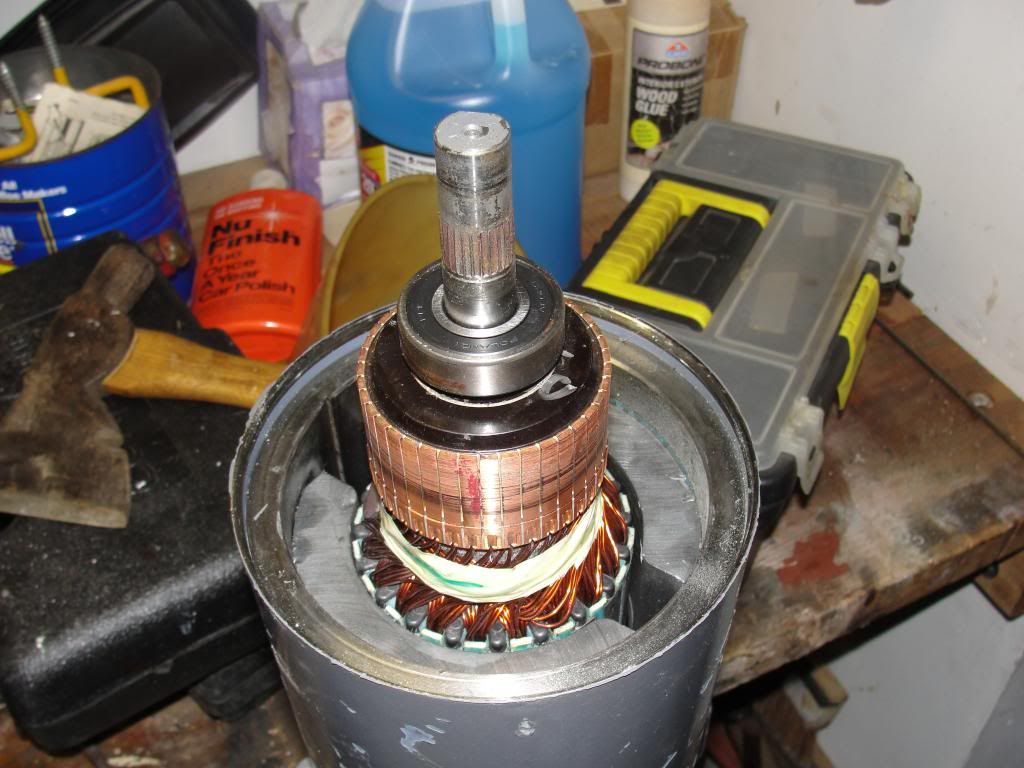
            • Puling Baldor commutator

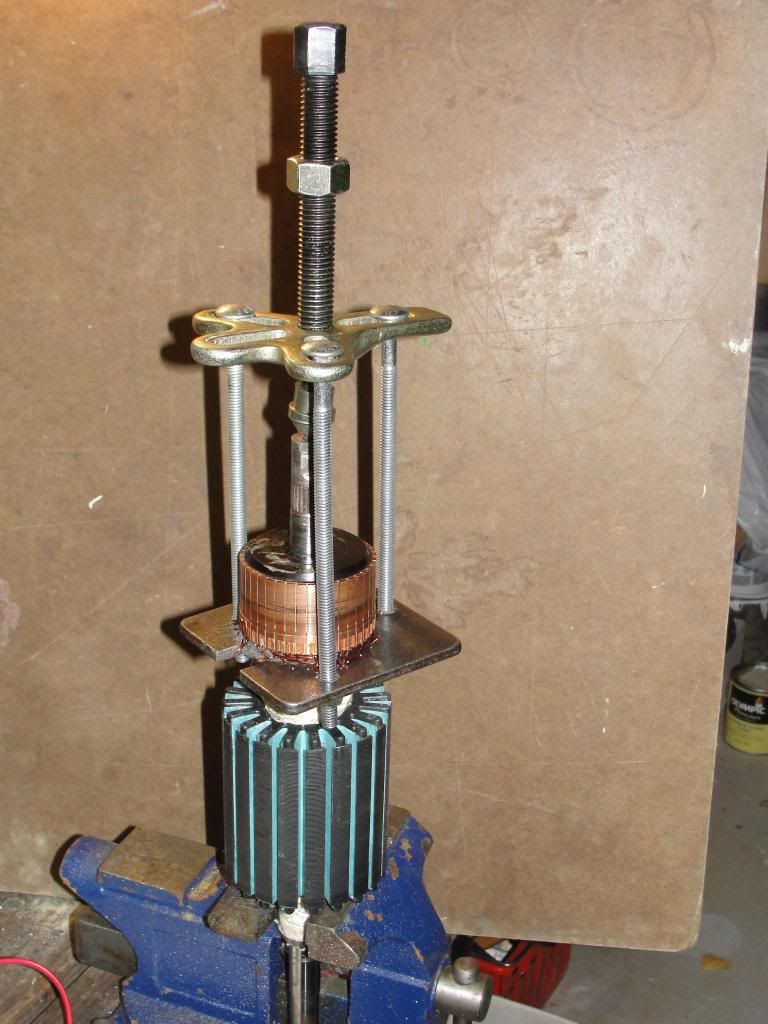
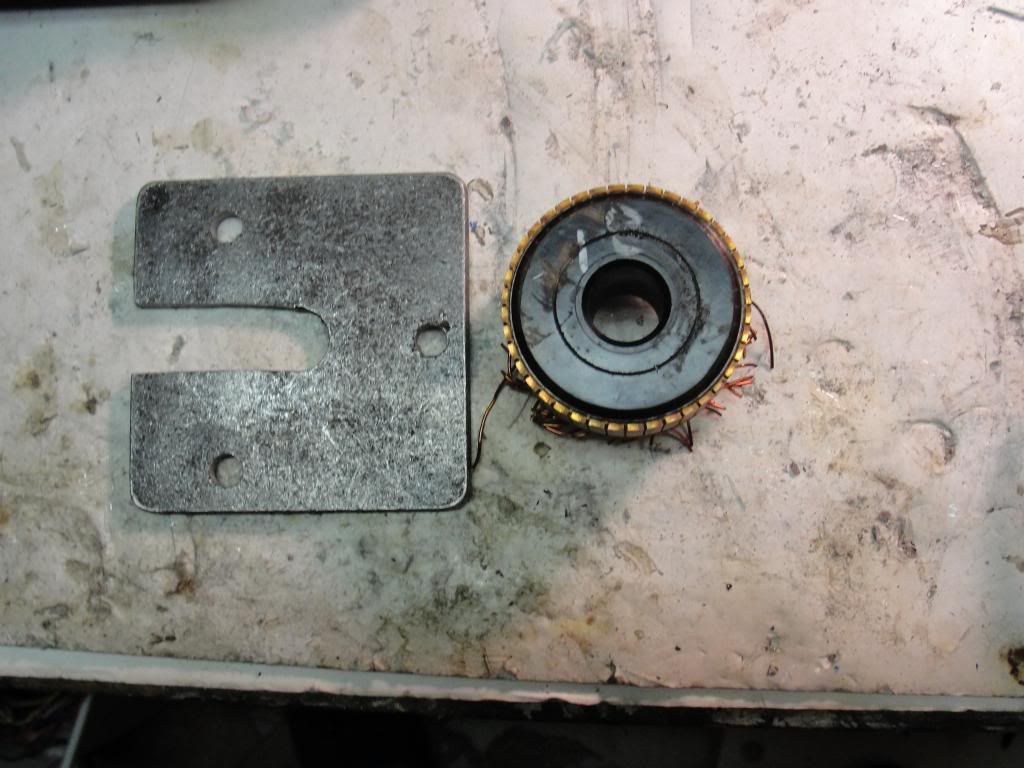
              Tried to jury rig something initially, but had to design an additional piece for my automotive puller set. Worked real nice.


              Here is the pulled commutator and large square flat washer you wont find at Lowe's or Home Depot, but at my local builders supply motor goldmine place, YEP.


              The commutator weighs about 1-2lbs. Heavy duty bakelite?
              Last edited by sampojo; 09-30-2013, 03:42 AM.
              Up, Up and Away

              Comment


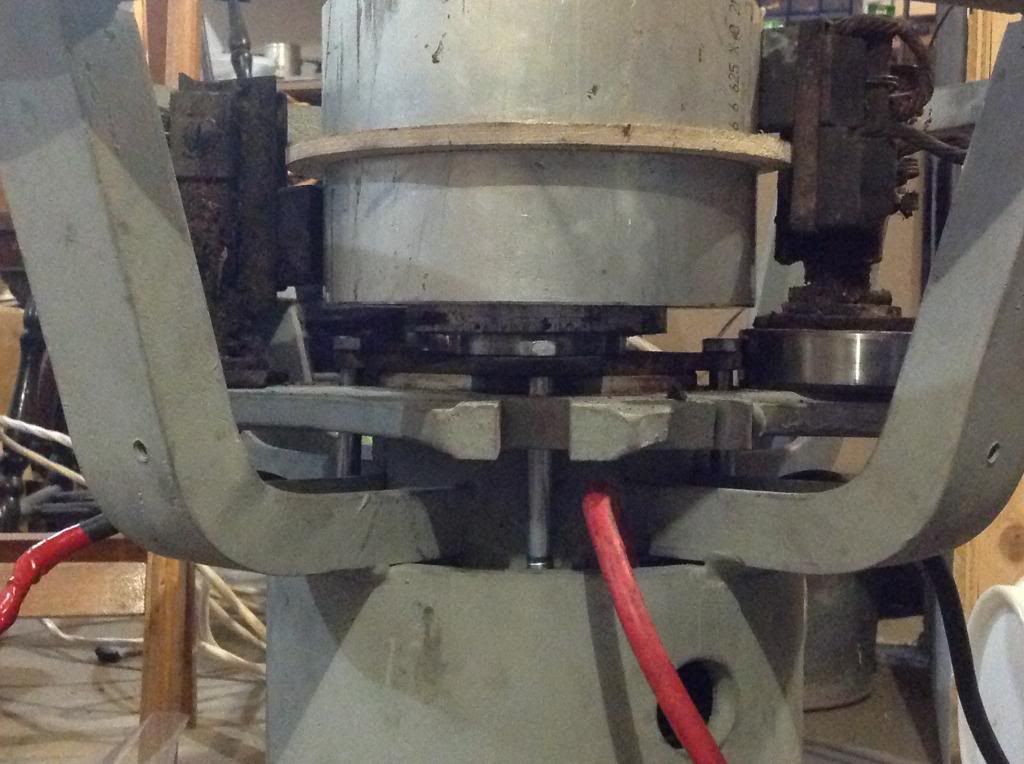
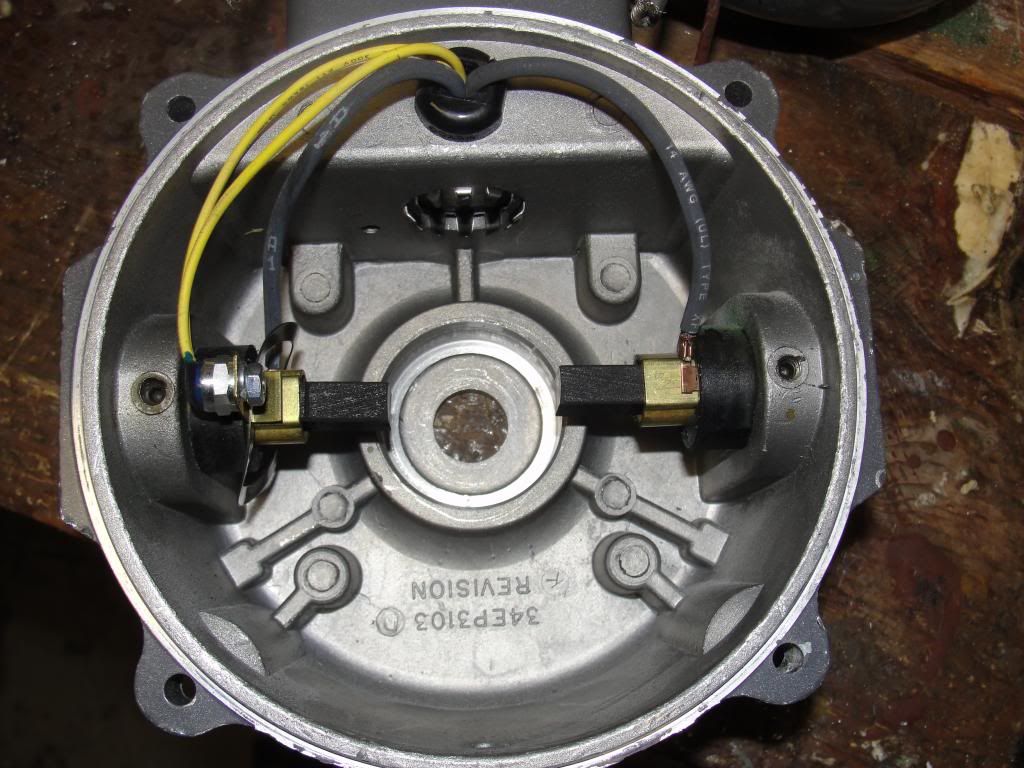
              • Thought I would post an update. Had to redo slips, and pretty much adjust every part, here is a pic of brushes set up on slip, right one has to be raised 1/2 ".


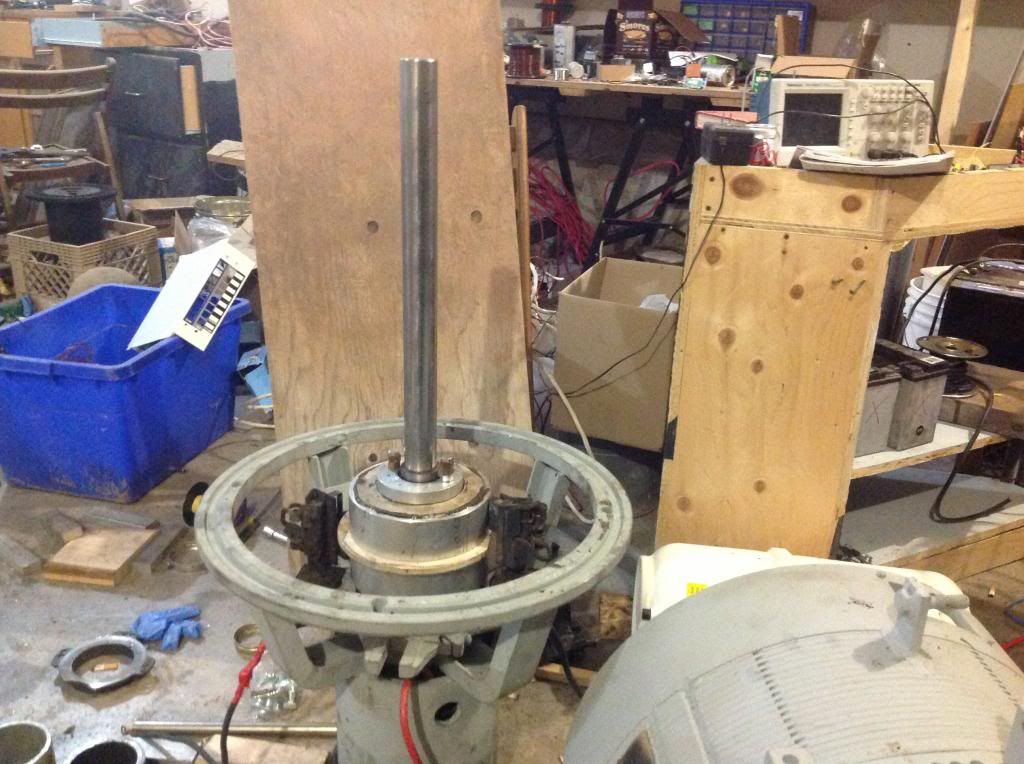
                Here is shaft in place. When I finished getting other slip on and brush mounts, I'll put it on lathe and make it straight, and grooves on slips for brushes. But it's pretty straight now.

                Comment


                • Kogs Update

                  Originally posted by JohnStone View Post
                  Hi,
                  sorry for your loss of electronics. I am confused too about your problem. It would be a great help for helping you if you would be able to post a circuit diagram of your setup with generator and driver. Obviously there was something wrong but I can not detect it by words only.
                  JS
                  G'day John and the rest of the team
                  I set up my testing of the Opto and Oscillator again.
                  I used 2 Voltage regulators Input max 40v here
                  10pcs DC DC LM2596 Step Down Module Adjustable Power Supply CC CV Output 1 3 35V | eBay

                  One used to deliver 12.1 Volts to the double output Oscillator here

                  Square Wave Signal Generator Duty Ratio Frequency Adjustable Signal Source | eBay
                  the other to deliver 14.8v to the Monster

                  I set the Oscillator to 1HTz and 50% duty cycle and connected both outputs to my 20HTz analogue Oscilloscope and set each channel Volts div to 0.5 and the Sect Div. to 0.1 and after alignment adjustment, I inverted channel 2 so as to be able to see clearly the oscillations they appear to be about 5v? and are oscillating consistently you can see the vid here
                  Checking The Opto Isolator 1 Video by Kogs1 | Photobucket

                  Then I inserted a Red LED and checked if it was OK here
                  Checking The Opto Isolator 2 Video by Kogs1 | Photobucket

                  Then I used Oscilloscope to check the opto was switching the current from 0 to 5v and this is shown here
                  Checking The Opto Isolator 3 Video by Kogs1 | Photobucket
                  It worked OK
                  I do not know why my previous uses of these signal generators failed when I used them on my Happy motor circuits.
                  But when I tested the monster circuit the other day it burned up the LED and the Generator failed to display/work where as when I tried to use it this time as you can see it seemed OK

                  Thanks John for your interest in helping us here its well appreciated
                  I will continue with the next step of the testing of the Monster probably the day after tomorrow as tomorrow my engineering friend is going to finish modifying the MY 1060 motors for me
                  Kindest Regards to you all

                  Working slowly but still working

                  Comment


                  • Originally posted by iankoglin View Post
                    .....

                    I set the Oscillator to 1HTz and 50% duty cycle and connected both outputs to my 20HTz analogue Oscilloscope and set each channel Volts div to 0.5 and the Sect Div. to 0.1 and after alignment adjustment, I inverted channel 2 so as to be able to see clearly the oscillations they appear to be about 5v? and are oscillating consistently you can see the vid here
                    Checking The Opto Isolator 1 Video by Kogs1 | Photobucket

                    Then I inserted a Red LED and checked if it was OK here
                    Checking The Opto Isolator 2 Video by Kogs1 | Photobucket
                    ...
                    Hi,
                    first of all we need to clarify some facts regarding your oscillator outputs. Ebay offer does not have any data sheet. I searched for another supplier and found some facts:
                    As far I understand this product there are two outputs basically the same but inverted behaviour.
                    Any output has one "OC" terminal for sink-only current up to 1200mA / 30V and one "5V" source-only for 20mA. This separation is very convenient.
                    They seem to tell us that outputs are MOS-FET controlled - those tiny SOT23 components (3 pin, SMD) behind terminals. Do not trust them to operate 1.2A. As usual Chineese tell you absolute maximum values only. But they are valid for very short time only. OK, a LED or an opto as load will be OK. But please understand they have absolutely no means for short circuit protection!!!!


                    Now please explain how you connected those components. Sorry I can think in terms of circuit diagrams only. All other descriptions are too ambigous.

                    BTW:
                    1. For all of you being eager to draw circuit diagrams please regard EAGLE ECAD program and watch this very totorial. In fact I learned from this guy operating EAGLE see.
                    2. Same guy being a good teacher has a series for Arduino as well.
                    JS
                    Last edited by JohnStone; 10-01-2013, 06:13 PM.
                    Experts spend hours a day in order to question their doing while others stopped thinking feeling they were professionals.

                    Comment


                    • Sketch 1

                      Originally posted by machinealive View Post
                      Here are your secret measurements UFO, remember not to show anyone

                      [IMG][/IMG]


                      Hello My Friend Machine,

                      Like the way is turning out with the slip rings/brushes

                      Machine, above is the promised Top View sketch...

                      A couple of things...

                      1- Need the Shaft Diameter, in order to start all... right from the "very" center , the "very" core...

                      2- I imagine in order to Lathe Shaft/assy you will need to build dead center alignment holes for Drum Shaft end to end...so please, verify measurements once you have everything aligned and rotating. Meaning, distances from that alignment hole to stators,etc.

                      Finally, I would like for Us to communicate in Millimeters, (I find it much more precise/accurate for this job) You do not have to re-measure nothing...I just have to "swap" from Decimal to Metric in the program..

                      My Questions/Concerns...

                      I will have to draw the Center Stator (Inner Exciter) from scratch...You do not have anything right?

                      And related to the Drum...first I will just conceive a "Ring"...a Solid Ring with holes (2 per Coil, to wind it like sewing through them...and overlapping Coils to have a very stable-solid output without much "decay"...obviously, all the holes would have to be widened with a Conical Bit at their ends, in order to get rid off sharp edges for wire smoothness in-out...But, I am mainly concerned about the way to fasten Drum to Star Bracket without interfering with coils once wounded... so I believe the way is right between the "Spiral" steps due to the Overlapped Coils will give us some room to be able to tap some thread for the fastening bolts.

                      If You have another idea about drum... please let me know...and...don't care if you use again that "Sophisticated CAD Hieroglyphics Software to decode Sumerian Texts"...

                      promise I will try to understand it...

                      Just joking...Your "CAD's" are awesome...

                      In the end this is purely Confidential...so no one is reading it...so, do not worry...


                      Warm Regards


                      Ufopolitics
                      Last edited by Ufopolitics; 10-02-2013, 03:19 AM.
                      Principles for the Development of a Complete Mind: Study the science of art. Study the art of science. Develop your senses- especially learn how to see. Realize that everything connects to everything else.― Leonardo da Vinci

                      Comment


                      • Nothing is "easy" my friend...

                        Originally posted by sampojo View Post
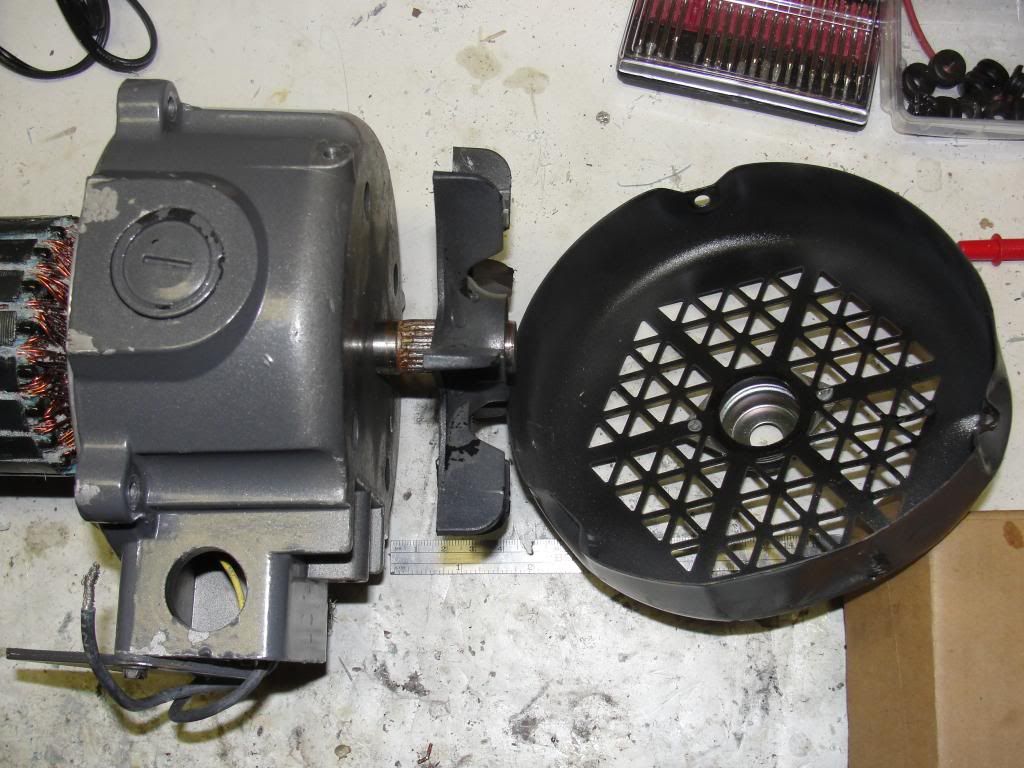
                        That is the short side. Here is the other side, it has a 1.75" shaft extension. Long enough for the business end, right? The symmetric business end had a slotted 2.25" shaft. I think the original picture of the shaft on the short side is just long enough to remount the symm motor fan, maybe.


                        So my small toy and window asym motors showed heating problems. This Baldor design is unique from what I have seen regarding how brushes are mounted. Usually brushes are mounted on a PCB type substrate. These are mounted within a heavy aluminum endcap, (electrically insulated of course) with high heat dissipation capability.


                        The brushes don't come out easy either. No luck there yet and no need to so far. As designed it is a totally sealed motor, getting cooling air blown across it on the outside, great for some pretty bad environments. I could mount the fan on one side still but not the business end though. But if you look here I think there is room for a thin fan between the bearing and comm that could blow air across comm and brushes thru the slots between the mags to a similar fan on the other side.


                        But I would have to open up some air holes on the endcaps. But even without the fans the heavy alum endcaps might mean it runs cooler than even the imperial, except it is all open. Its brushes are on a fiber substrate right?

                        @Ufo, should I break open the endcaps for air, drilling a lot of holes to admit air and think about putting in a fan? Maybe see how it runs, then go for it if it seems hot... would only need to pop off bearings to mount a new fan...

                        Here is the big question. As you may have noticed these rotors are again different with the winding. The rotor was completely stuffed with wire. I estimate about 450' on the smaller half horse rotor, at 19AWG. When you recommended higher ohms on a 5-pole design in post 5428 and going to a higher gauge, I have usually bumped it up 2AWG on my motors, but I still have had the heating probs. Am wondering heavily if I should maybe use 22AWG? Not sure if I was measuring it right but with the 19 sym wiring, I barely got just under 3 ohms there on the whole winding across all poles. You were talking 2-3 ohms per coil right? That would be a total of 15 to compare it with the sym wires. So that AWG has to go up some.

                        @UFO, whats your assessment, 22 OK? 23 maybe?

                        I have an idea on a way to calculate an approximation. Definitely take some head scratching...

                        Thanks Sam
                        Hello Sam,

                        If you like to make it an "Open Motor" is ok...it all depends upon the application it would be used for...

                        For example...making holes/openings into an exposed motor to the weather...is not recommended...but if it is meant to be used in an enclosed environment, like turning a Generator inside a room...then by all means do it.


                        Related to wire gauge within such small differences (22-23 awg) it really does not make that much of a difference really...so do not waste your mind in Formulas.

                        What I will like you to try...is what I have written in some posts above...or using a few strands of finer wire attached/ litz together...they could be...26...or 32...just wind a Coil on Armature considering size and room...then measure its resistance with the number of single strands utilized...

                        ...This will result in Multi-Filar Coils....This will enhance/amplify Your Magnetic Fields for both Energies...

                        ...You could play with # of strands and Gauge awg of Strands to reduce or add resistance, since the distance(length) would be the same for all coils...more alternatives here right?


                        Now, about your other posts comments...

                        I love that tool you have designed!!!...Excellent!, creativity and Innovation at its best!...

                        About the "Super Heavy Bakelite"...nope, I bet you those Commutators have built within a "Super Heavy" Steel Ring towards the inner diameter...plus the Inner Copper "Duck Tails" are super heavy duty...


                        Warm Regards Friend


                        Ufopolitics
                        Last edited by Ufopolitics; 10-02-2013, 01:52 AM.
                        Principles for the Development of a Complete Mind: Study the science of art. Study the art of science. Develop your senses- especially learn how to see. Realize that everything connects to everything else.― Leonardo da Vinci

                        Comment


                        • Hello UFO

                          What ya doing?, How is your work going? Haven't seen any posts of your machines lately .

                          Anyway, thanks for posting. I'm am just starting to drill for brush mounts on bottom. I am not sure if I can squeeze 2 slips on that end, 1 at least. We'll see after I drill. I will post tonight or tomorrow, all measurements you need. Hopefully
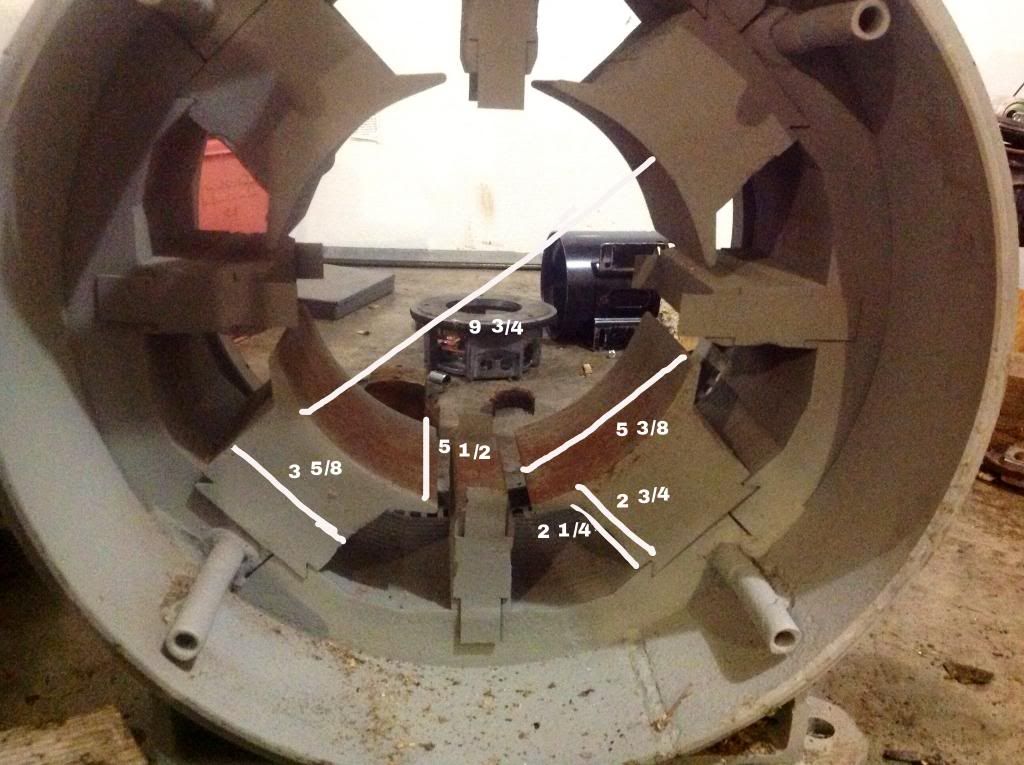
                          Maybe we can discuss gap size, I do have some thoughts on drum, depends on how big of a gap, is too big. I have a 7 " aluminum pipe. If we use that for drum I could get the drum done easy, but that is close 3 " gap, but that is also only 1 1/2" depth for each stator magnet pair, that is not huge. Then I can bolt a plate to the end, maybe 3/16 aluminum, and weld to a collar, then lock on slip ring frame. Then we screw angle aluminum, or angle iron, to the the 7 " drum, to wind around, fins, like the asymmetric stator.

                          I haven't looked for stator frame with fins yet, maybe I'll find the perfect one.

                          So, you don't seem to like the drum with fins idea, wound like your stator. Is there something I'm not seeing? Do you not think it will work?

                          Comment


                          • Hello my Friend

                            Originally posted by machinealive View Post
                            Hello UFO

                            What ya doing?, How is your work going? Haven't seen any posts of your machines lately .

                            Anyway, thanks for posting. I'm am just starting to drill for brush mounts on bottom. I am not sure if I can squeeze 2 slips on that end, 1 at least. We'll see after I drill. I will post tonight or tomorrow, all measurements you need. Hopefully
                            Maybe we can discuss gap size, I do have some thoughts on drum, depends on how big of a gap, is too big. I have a 7 " aluminum pipe. If we use that for drum I could get the drum done easy, but that is close 3 " gap, but that is also only 1 1/2" depth for each stator magnet pair, that is not huge. Then I can bolt a plate to the end, maybe 3/16 aluminum, and weld to a collar, then lock on slip ring frame. Then we screw angle aluminum, or angle iron, to the the 7 " drum, to wind around, fins, like the asymmetric stator.

                            I haven't looked for stator frame with fins yet, maybe I'll find the perfect one.

                            So, you don't seem to like the drum with fins idea, wound like your stator. Is there something I'm not seeing? Do you not think it will work?


                            Hey Machine,


                            I am fine...just working......You have not seen them?...But I have been posting on the Outer Rotors?.

                            Now , the Dilemma We are facing on the Figuera's Generator / Imperial Set Up...

                            The Limitations You have there related to Drum size/thickness/air gaps,etc...is that We are starting DESIGNING from OUTSIDE-INTO SHAFT...Not like is supposed to be...from shaft towards outside.

                            For example, In Making of the Asymmetric Dual Rotor Motor for Imperial...We already have an existing and complete Inner Armature from Shaft up...so expanding Design Outwards is an easy piece...no limits...understand my friend?

                            Now...Last Night I was putting together Your Set Up Inner Components...Drum,Stator/Inner:

                            [IMG][/IMG]

                            The Fact of having already built the Bulky Outer Stators Core, creates an specific area of Core (let's only look at it in a 2D Area, since length would be equal for all components), So it is NOT possible to Match them exactly the same, plus adding the Geometry difference between Outer bigger Diameter to Inner smaller Diameters.

                            If You notice, the shaded with squares areas are the "Ideal" ones to be reproduced for the Inner Exciters...but it can not "fit"...unless We reduce it to the Red Triangular Shaded Area...Then We will NOT have Equal/Balanced Cores...Magnetic Fields would be very different...and sinewaves would be Up-Down between High-Low Values.

                            The Solution (Yes there is a Solution...)...Is to either:

                            1- Take Off the existing Outer Stators Core from Outer Ring...and reduce their Main Core to be able to match the Inner Core Area...I see this as a very hard to make option for you...lots of work my friend...However, this is just Physical/Mechanical work...but the result would be very accurate and only one time.

                            2-Second option, would be playing with the winding length of the Coils...would have to be different for both Matching/Mating Inner-Outer Exciter Coils...other words...the Inner Cores would have to be bigger/larger wire length than the Outer Exciters in order to compensate the difference in Area, rendering equal Magnetic Fields...Now, the way to measure this would be with a Field Strength Meter...with capacity for the MF generated...or Calculating Core Area Differences versus winding length...

                            But, resuming...no matter what the two options we will take...Inner Cores only can take "X" amount of Core Area in order to leave some nice space for the Drum within both Stators PLUS the DUAL Air Gaps...and the more space we conceive for Drum...the less the Inner Core Area would be...so the more the differences with outer....This is our "Dilemma" ...

                            If You notice in this Design above, the Drum, plus Air Gaps will have to be built within only 1.6 Inches...rounding it to 1.5 in...that is a very "tight room" for Drum right?...I will figure from around Two (2) Inches would be a decent size...but no sweat, could be done like I wrote...reducing a bit more the Inner Cores.

                            So, you don't seem to like the drum with fins idea, wound like your stator. Is there something I'm not seeing? Do you not think it will work?
                            Now, related to My Stator with Fins...and the Figueras Drum...I am completely lost about what you are trying to do...sorry, but am serious...I do not see how You are planning this...


                            Warm Regards


                            Ufopolitics
                            Last edited by Ufopolitics; 10-03-2013, 02:55 AM.
                            Principles for the Development of a Complete Mind: Study the science of art. Study the art of science. Develop your senses- especially learn how to see. Realize that everything connects to everything else.― Leonardo da Vinci

                            Comment


                            • Hey UFO,

                              I meant pics of your work, not your drawings . But I like your drawings..

                              My 6 " power hacksaw would allow me to cut the stators narrower. My mill is too small.
                              OR
                              what if I wound the outer stator coils around the interpoles.

                              Comment


                              • Hopefully testing this weekend

                                @all

                                85% complete!

                                Keep it Clean and Green

                                Midaz
                                Last edited by Midaztouch; 10-05-2013, 04:43 AM.

                                Comment

                                Working...
                                X